Updating a Secondary Data Source in InfoPath Using AJAX
 
Published: 01 Nov 2006
Abstract
Microsoft Office InfoPath does not offer out-of-the-box persistence of data in secondary data sources; only data within the Main data source is persisted. To make updating secondary data sources possible, changes have to be saved back to the underlying source of secondary data sources. This article shows how you can use AJAX to update the data of a secondary data source.
by S.Y.M. Wong-A-Ton
Feedback
Average Rating: This article has not yet been rated.
Views (Total / Last 10 Days): 37803/ 51

Introduction

Secondary data sources in Microsoft Office InfoPath are XML files, databases, SharePoint lists, or web services that have been linked to an InfoPath form, but for which no data is persisted in the form itself.  Therefore, any changes made to the data of a secondary data source are lost upon closing the form, unless these changes have been saved back to the underlying data store of the secondary data source.

This article discusses the use of Asynchronous JavaScript and XML, better known as AJAX, to permanently update data in a secondary data source for which the underlying source is a database table in Microsoft SQL Server.

Software Requirements

·         Microsoft Office InfoPath 2003 Service Pack 2 (SP2)

·         Microsoft Visual Studio .NET 2003

·         Microsoft Visual C#

·         Microsoft SQL Server 2000

·         Internet Information Services (IIS)

How It Works

You can add AJAX functionality to an InfoPath form through the use of the XMLHTTPRequest object.  The InfoPath form can use this object to send requests to a web server, which in turn does some work - e.g. updates the underlying data store of a secondary data source as discussed in this article - and returns a response in XML format to the InfoPath form.  Since AJAX calls are asynchronous, the user can continue using the InfoPath form, while the server is doing its work. When the call returns, InfoPath can pick up the XML data returned by the server and load it into part of or the entire InfoPath form or just refresh the updated data in a secondary data source.

Creating the InfoPath Form

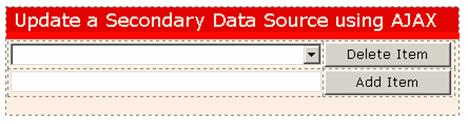
Open Microsoft Office InfoPath and create a New Blank Form.  Use the controls, field names, and data types listed in Table 1 to construct the form and modify it to resemble Figure 1.

Table 1 - Settings for the controls on the InfoPath form

Control

Field Name

Data Type

Drop-Down List Box

listItems

Text (string)

Text Box

newItem

Text (string)

Button

btnDeleteItem

-

Button

btnAddItem

-


Figure 1 - InfoPath form in design mode

Create the Database Table

Use the information displayed in Table 2 to create a table called Properties in Microsoft SQL Server.

Table 2 - Table column settings for Properties table in Microsoft SQL Server 


Column Name

Data Type

Allow Nulls

Value

int (identity, primary key)

No

Name

varchar(50)

No


Add a Data Connection for the Secondary Data Source

Create and bind the drop-down list box to the secondary data source.

1.      Double-click on the drop-down list box to open its Properties dialog box.

2.      Select the Look up values in a data connection to a database, Web service, file, or SharePoint library or list radio button under List box entries.

3.      Click on the Add… button to open the Data Connection Wizard.

4.      Select the Database (Microsoft SQL Server or Microsoft Office Access only) radio button and click on Next >.

5.      Click on the Select Database… button.

6.      Click on the New Source… button and follow the instructions to set up a connection to the database table you previously created in Microsoft SQL Server and select this new source to be used as a secondary data source in the InfoPath form.

7.      Click on the Next > button when you get back in the first Data Connection Wizard.

8.      Click on the Finish button to close the Data Connection Wizard.

9.      Back in the Properties dialog box, click on the Select XPath button behind the Entries field.

10.  Select the Properties node in the Select a Field or Group dialog box and click on OK.

11.  Back in the Properties dialog box, click on the Select XPath button behind the Value field.

12.  Select the Value node in the Select a Field or Group dialog box and click on OK.

13.  Back in the Properties dialog box, click on the Select XPath button behind the Display name field.

14.  Select the Name node in the Select a Field or Group dialog box and click on OK.

15.  Click on OK to close the Properties dialog box.

Add Event Handlers and AJAX Code

Make sure the default programming language of the form is set to JScript by selecting the Tools > Options… menu item, clicking on the Design tab on the Options dialog box, and setting the Default programming language to JScript.

Open the Microsoft Script Editor by selecting the Tools > Programming > Microsoft Script Editor menu item.  Append the code displayed in Listing 1 to the code that InfoPath has added for you by default.

Listing 1 - AJAX functions

var req = null; 
var READY_STATE_COMPLETE = 4;
function sendRequest(url, params, HttpMethod)
{
  if (!HttpMethod)
  {
    HttpMethod = "GET";
  }
  req = new ActiveXObject("Microsoft.XMLHTTP");
  if (req)
  {
    req.onreadystatechange = onReadyState;
    req.open(HttpMethod, url, true);
    req.setRequestHeader("Content-Type", "application/x-www-form-urlencoded");
    req.send(params);
  }
}
 
function onReadyState()
{
  var ready = req.readyState;
  var data = null;
      
  if (ready == READY_STATE_COMPLETE)
  {
    data = req.responseText;
    XDocument.DataObjects["Properties"].Query();
    XDocument.DOM.selectSingleNode("//my:listItems").text = 
            XDocument.DOM.selectSingleNode("//my:newItem").text;    
    XDocument.DOM.selectSingleNode("//my:newItem").text = "";
  }   
}

Listing 1 displays two core functions needed to make AJAX calls to the web server.  The first function, sendRequest(), creates an XMLHTTPRequest object to be able to prepare and send a request to the web server, while the second function, onReadyState(), is an asynchronous event handler that continuously polls for responses coming back from the web server.  When a response comes back from the web server, you can retrieve the XML data sent back from the web server using

data = req.responseText;

and refresh the list of items in the drop-down list box by using the Query() method of the secondary data source as in

XDocument.DataObjects["Properties"].Query();.

Finally, you can set the selected value of the listItems drop-down list box to the value of the newItem text box

XDocument.DOM.selectSingleNode("//my:listItems").text = 
    XDocument.DOM.selectSingleNode("//my:newItem").text; 

and then clear the newItem text box with

XDocument.DOM.selectSingleNode("//my:newItem").text = "";.

Switch back to Microsoft Office InfoPath and double-click on the Add Item button to open its Properties dialog box.  Click on the Edit Form Code… button to switch back to the Microsoft Script Editor and add an OnClick event handler for this button.  Add the code displayed in Listing 2 in the OnClick event handler you just added.

Listing 2 - Code in the OnClick event handler for the Add Item button

var value = XDocument.DOM.selectSingleNode("//my:newItem").text;
sendRequest("http://localhost/UpdateDSwithAjax/Default.aspx","q="+value+"&a=a","POST");

The code in Listing 2 passes two parameters (q and a) to an ASP.NET page called Default.aspx that is located on a web server at http://localhost/UpdateDSwithAjax/.  "q" is set to the value of the text in the newItem text box, while "a" is set to an "a" to indicate that the item should be added.

Switch back to Microsoft Office InfoPath and double-click on the Delete Item button to open its Properties dialog box.  Click on the Edit Form Code… button to switch back to the Microsoft Script Editor and add an OnClick event handler for this button.  Add the code displayed in Listing 3 in the OnClick event handler you just added.

Listing 3 - Code in the OnClick event handler for the Delete Item button

var value = XDocument.DOM.selectSingleNode("//my:listItems").text;
 sendRequest("http://localhost/UpdateDSwithAjax/Default.aspx","q="+value+"&a=d","POST");

The code in Listing 3 passes two parameters (q and a) to the ASP.NET page.  "q" is set to the value of the selected item in the listItems drop-down list box, while "a" is set to a "d" to indicate that the item should be deleted.

Creating an ASP.NET Page to Update the Secondary Data Source

Since persisting changes made to a secondary data source means updating the data store underlying the secondary data source, you can write code within an ASP.NET page to save changes back to the database table pertaining to the secondary data source.

Open Microsoft Visual Studio and create a new web site.  Make sure that the web site is located at the URL you specified in the calls to the web server in the InfoPath form; in our case, http://localhost/UpdateDSwithAjax/Default.aspx would be the full URL to the ASP.NET page performing the updates to the underlying data of the secondary data source.

Delete the HTML content that Microsoft Visual Studio adds for you by default from within the Default.aspx page.  Open the code-behind file for the Default.aspx page and add a using statement for the System.Data.SqlClient namespace.  Then add the code listed in Listing 4 to the Page_Load event handler for the web page.  Do not forget to change the SQL connection string to match the settings for your own SQL Server database.

Listing 4 - Code in the Page_Load event to update the database table

Response.ContentType = "text/xml";
 
string paramValue = Request.Form["q"];
string action = Request.Form["a"];
 
using (SqlConnection conn = new SqlConnection(
  "Data Source=MyServer;Initial Catalog=MyDB;Integrated Security=True"))
{
  if (action != null && action != string.Empty 
    && paramValue != null && paramValue != string.Empty)
  {
    SqlCommand cmd = new SqlCommand();
    cmd.Connection = conn;
 
    switch (action)
    {
      case "a":
        cmd.CommandText = "INSERT INTO Properties (Name) VALUES (@Name)";
        cmd.Parameters.Add ("@Name", paramValue);
        break;
      case "d":
        cmd.CommandText = "DELETE FROM Properties WHERE Value = @Value";
        cmd.Parameters.Add ("@Value", paramValue);
        break;
      default:
        break;
    }
 
    conn.Open();
    cmd.ExecuteNonQuery();
    conn.Close();
  }
 
  string result = "<?xml version=\"1.0\" ?><result/>";
  Response.Write(result);
}

First you set the content type of the web page to text/xml so that the web page can return XML data to your InfoPath form.  You are not going to do anything with this XML, but if you wanted to you could use it to dynamically populate controls on the InfoPath form or the entire form itself. The latter is beyond the scope of this article.

Response.ContentType = "text/xml";

Next, you retrieve the parameters that were passed to the web page.

string paramValue = Request.Form["q"];
string action = Request.Form["a"];

You then create a connection to the server and database where the underlying store of the secondary data source is located-

SqlConnection conn = new SqlConnection(
 "Data Source=MyServer;Initial Catalog=MyDB;Integrated Security=True")

and based on the action requested (an addition or deletion of an item) generate an INSERT or DELETE statement to execute.

switch (action)
{
  case "a":
    cmd.CommandText = "INSERT INTO Properties (Name) VALUES (@Name)";
    cmd.Parameters.Add ("@Name", paramValue);
    break;
  case "d":
    cmd.CommandText = "DELETE FROM Properties WHERE Value = @Value";
    cmd.Parameters.Add ("@Value", paramValue);
    break;
  default:
    break;
}

You then open the connection to the database, execute the query, and close the connection.

conn.Open();
 cmd.ExecuteNonQuery();
 conn.Close();

The web page then returns an XML string to the caller, your InfoPath form, to indicate that the update has been performed.

string result = "<?xml version=\"1.0\" ?><result/>";
Response.Write(result);

The InfoPath form will receive this XML string in its onReadyState() event handler and can use it as a trigger to refresh the list of items in the drop-down list box that is bound to the secondary data source.

Tip: Test whether the web page is working before calling it from the InfoPath form.  You will need to set proper security permissions on the database and Properties table for the identity under which the web site is running.

Conclusion

In this article you saw how to update the data of a secondary data source by using AJAX to call an ASP.NET page, perform updates to the data store of the secondary data source, and return XML data to the InfoPath form to trigger a refresh of the data in the secondary data source.

While there are different ways to update data within a secondary data source, this technique offers the following benefits:

1.      It can be used with any web technology that is able to perform an update to the underlying data store of a secondary data source in InfoPath and then return XML data, including classic web technology such as e.g. Active Server Pages.

2.      It makes use of the asynchronous nature of AJAX to automatically refresh the data in the secondary data source after the update has been completed, making it ideal for situations in which code might take a long time to run when performing an update.  


User Comments

No comments posted yet.


Community Advice: ASP | SQL | XML | Regular Expressions | Windows


©Copyright 1998-2024 ASPAlliance.com  |  Page Processed at 2024-04-25 8:28:41 AM  AspAlliance Recent Articles RSS Feed
About ASPAlliance | Newsgroups | Advertise | Authors | Email Lists | Feedback | Link To Us | Privacy | Search