[ Download Code ]
There are a total of eight controls which I am using in this example of which three are RequiredFieldValidators and one is a Label. I will not discuss these controls rather you may take time to read the following.
1. TextBox Control
2. Label Control
3. RequiredFieldValidator Control
4. HtmlInputFile Control
WebForm Screenshot:
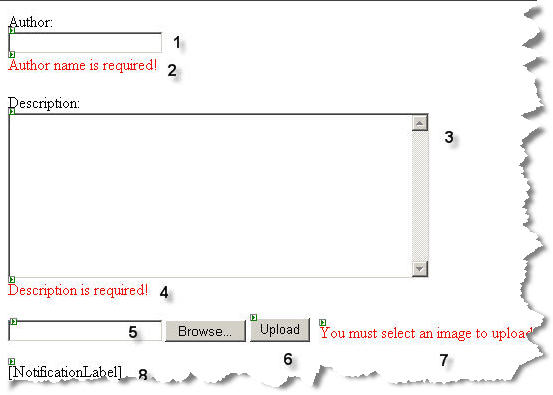
The one unique step you need to take for the HtmlInputFile Control is to import the System.Web.UI.HtmlControls Namespace. As well you will need to add the runat="server" attribute to this control.
Once you have created your web form you should have something similar to the one above. If you view the source of this form you should have something similiar to this.
<form id="Form1" method="post" encType="multipart/form-data" runat="server">
<P>Author:<BR>
<asp:TextBox id="AuthorTextBox" runat="server" MaxLength="50"></asp:TextBox><BR>
<asp:RequiredFieldValidator id="RequiredFieldValidator2" runat="server"
 ControlToValidate="AuthorTextBox" ErrorMessage="Author name is required!">
 </asp:RequiredFieldValidator></P>
<P>Description:<BR>
<asp:TextBox id="DescriptionTextBox" runat="server" MaxLength="5000" Rows="10"
 TextMode="MultiLine" Columns="50"></asp:TextBox><BR>
<asp:RequiredFieldValidator id="RequiredFieldValidator1" runat="server"
 ControlToValidate="DescriptionTextBox" ErrorMessage="Description is required!">
 </asp:RequiredFieldValidator></P>
<P><INPUT type="file" name="FileToUpload" id="FileToUpload" runat="server">
<asp:Button id="UploadButton" runat="server" Text="Upload"></asp:Button>
<asp:RequiredFieldValidator id="UploadValidator" runat="server"
ErrorMessage="You must select an image to upload"
 ControlToValidate="FileToUpload"></asp:RequiredFieldValidator></P>
<P>
<asp:Label id="NotificationLabel" runat="server" Visible="False">
</asp:Label></P>
</form>
Now that you have you web form ready let us know take a look in the code behind.