AspAlliance.com LogoASPAlliance: Articles, reviews, and samples for .NET Developers
URL:
http://aspalliance.com/articleViewer.aspx?aId=130&pId=-1
ASP.NET Controls - Part One
page
by Devarticles.com
Feedback
Average Rating: This article has not yet been rated.
Views (Total / Last 10 Days): 29131/ 64

Introduction

One of the best things about ASP.NET is the ability to easily separate code into different modules, unravelling presentation code from application logic. This allows developers with different skills sets to work on their area of speciality simultaneously (e.g. web designers working on HTML code while programmers work on ASP.NET code). Because of its object-orientated nature, ASP.NET also promotes code reuse.

In ASP.NET, there are several features that we can use to make our code reusable and independent of other code. These features are: user controls, server controls, HTML controls, custom controls, components, and the code behind method.

In this article, I will explain what each of these features are used for, and also show you how to use each one, by providing a number of simple yet detailed examples. To work with the examples in this article, you should have the .NET SDK installed on your Windows 98, NT, 2000, or XP machine. It can be downloaded free from MSDN

User Controls

In ASP.NET, user controls are like the replacement of server-side includes from traditional ASP. They allow you to separate code that is constantly reused (such as menu bars) into separate files, which provides us with two benefits:

  • It allows you to write less code, because we only have to link to the external file from any page that we want to use it on.
  • When you decide to change the code that a user control is composed of, you will only have to change it in one file, rather than on all of the pages where it is used.

Let's take a look at an example of a user control, so as to demonstrate their use. We will create a HTML page that has a menu bar. Because we don't want to code the menu bar on every page, we will create a user control, which will represent the menu. Open up notepad and enter the following code:


<table width = "120" border="0" cellspacing="0" cellpadding="0">
<tr>
<td>
DevArticles left menu bar
</td>
</tr>
<tr>
<td>
- Menu Item 1
<br>
- Menu Item 2
<br>
- Menu Item 3
</td>
</tr>
</table>

Save the file as leftmenu.ascx and close the file. Open up a new notepad window and enter the following code:

<%@ Register TagPrefix ="devArticles" TagName = "LeftMenu" Src = "leftmenu.ascx"%>

<html>
<head>
<title> devArticles - User Control Example </title>
</head>
<body>
<table width ="100%" bgcolor = "#000000" cellspacing = "1">
<tr>
<td bgcolor = "#ffffff" width = "120" valign = "top">
<devArticles:LeftMenu id = "LeftMenu" runat = "server"/>
</td>
<td bgcolor = "#ffffff" valign = "top">
Your content goes here
</td>
</tr>
</table>
</body>
</html>


Save the file as ucexample.aspx and close notepad. When you run this page in your browser, it should look like this:

Output of above code - aspcn_1.gif

Let's take a look at the code in the ucexample.aspx page:

<%@ Register TagPrefix ="devArticles" TagName = "LeftMenu" Src = "leftmenu.ascx"%>

This code above registers our user control (leftmenu.ascx) as a specific tag. In this case, I have assigned it to the <devArticles:LeftMenu> tag. As you can see, our tag includes a tag prefix, as well as a tag name. Both of these values are defined in the tag that we used to register our user control. Whenever the server locates this tag in our ASP.NET page, it replaces it with the content of the page referenced by the src attribute of the user controls tag (which would be leftmenu.ascx in our case).

As you would have noticed from the example above, user controls are saved with a different file extension to ASP.NET pages. They are saved as .ascx pages. A little later in the ucexample.aspx page, you will notice the <devArticles:LeftMenu id = "LeftMenu" runat = "server"/> tag, which as I've mentioned, is replaced with the contents of the leftmenu.ascx page. When you look at the page source for ucexample.aspx, you'll see that the contents of leftmenu.ascx have been included in place of the <devArticles:LeftMenu> tag:

<html>
<head>
<title> devArticles - User Control Example </title>
</head>
<body>
<table width ="100%" bgcolor = "#000000" cellspacing = "1">
<tr>
<td bgcolor = "#ffffff" width = "120" valign = "top">
<table width = "120" border="0" cellspacing="0" cellpadding="0">
<tr>
<td>
DevArticles left menu bar
</td>
</tr>
<tr>
<td>
- Menu Item 1
<br>
- Menu Item 2
<br>
- Menu Item 3
</td>
</tr>
</table>

</td>
<td bgcolor = "#ffffff" valign = "top">
Your content goes here
</td>
</tr>
</table>
</body>
</html>
HTML Controls and Server Controls

HTML controls and server controls are somewhat similar, and can sometimes be used interchangeably to do the same thing. For example, <asp:Image> and <img runat="server"> both accomplish the same task, displaying an image on a web page.

HTML controls refer to HTML tags that have the runat="server" attribute. For example, <img src=""> is a standard HTML tag, where as <img src="" runat="server"> is an HTML Control.

Server controls refer to tags starting with <asp. For example, <asp:DataGrid id="" runat="server"> and <asp:image id="" runat="server">. The main advantage of using server controls over HTML controls is that they are used to provide some sort of added functionality for your ASP.NET pages, such as interactive data grids and calendars. The output code is generated dynamically from server controls, and they only output code that is compatible with the client's web browser. Server controls provide programmers with a richer set of features than HTML controls.

You can use both HTML controls and server controls for just about anything. However, the main purpose of these controls is to help separate HTML presentation code from application logic code. Notice how I've said "help separate"? to completely separate them from HTML code, you need to move them to a different file. We will need to use code behind technique to accomplish this, which we will cover soon.

Using both HTML and server controls also allows us to control their properties dynamically. Let's have a look at an example to demonstrate the use of HTML and server controls. This page will hide display the devArticles logo if the client's browser is Internet Explorer only. The logo will be hidden if another browser, such as Netscape navigator is detected. The example below demonstrates how we can manipulate the properties of controls dynamically, as well as how we can use controls to separate HTML from application logic.

Open up notepad and enter following code. Save it as samplecontrol.aspx:

<html>
<head>
<title>Server Control and HTML Control Example</title>
<script language ="c#" runat="server">

void page_load()
{
if (Request.Browser.Browser != "IE")
{
devLogo.Visible = false;
}
browserName.Text = Request.Browser.Browser;
}

</script>
</head>
<body>
<img src = "http://www.devarticles.com/dlogo.gif" runat= "server" id = "devLogo">
<br>You are running <asp:Label id= "browserName" runat="server"/>
</body>
</html>

When you run this page in Internet Explorer, it should look like this:

aspcn_2.gif

It should look like this in Netscape Navigator:

aspcn_3.gif

Let's walk through the code in our server control example shown above.

if (Request.Browser.Browser != "IE")
{
devLogo.Visible = false;
}

The code above checks whether or not the users browser is Internet Explorer. Because all ASP.NET pages are processed on the server, if the user isn't running IE then the visible property of the devLogo HTML image control is set to false, which results in the image not being displayed on the page at all (ie: its <img> tag isn't even written to the page).

browserName.Text = Request.Browser.Browser;

The line above changes the text property of our label control to the name of the users browser, such as "IE" or "Netscape". The text property of a label control is actually the value that is output to the users browser, so if the user was running Internet Explorer for example, then the <asp:label> tag will be replaced with "IE". As with the <image> HTML control, the visitor will never actually see the <asp:label> server control.

Now that we've gone through the details of the example shown above, let's take a look at the equivalent code we would've had to use in traditional ASP to accomplish the same result:

<html>
<head>
<title>Server Control and HTML Control Example</title>
</head>
<body>
<%
set objBrowserType = Server.CreateObject ("MSWC.BrowserType")
if objBrowserType.Browser = "IE" then
%>
<img src="http://www.devarticles.com/dlogo.gif">
<%
end if
%>
<br>You are running <%=objBrowserType.Browser%>
<%
set objBrowserType = nothing
%>
</body>
</html>

As you can see, it's fairly messy and unorganized. The ASP and HTML code is mixed together, and when a designer or programmer attempts to edit the code, they may not know both ASP and HTML and could get confused. At least with the ASP.NET server controls and HTML controls, we can separate HTML code from application logic, clearly showing where the ASP.NET code ends, and where the HTML code starts.

You should always use HTML and server controls when you have dynamic content, and need to separate your HTML presentation code from your application logic code. I use HTML and server controls extensively on my site, and I find that it makes managing my code so much easier.

Code Behind
Now that we've covered user controls, HTML controls, and server controls, it's time to look at the code behind method, which you can use to further separate the presentation layer from the application logic layer. The code behind method is a lifesaver for developers planning to undertake large-scale web-based projects.

To use the code behind methods, we need to create two separate files: the first is a standard .aspx file (which will contain HTML code and link to the code behind file), and the second is the actual code behind file (which contains actual application logic and can have any file extension).

[Note] You can use .cs extensions for code behind files that are created in C#. If you’re familiar with VB.NET, you could name your code behind files with a .vb extension. My personal preference, however, is to use the .aspx.cs extension for C# code behind files, and .aspx.vb for VB.NET code behind files. This is a popular code behind naming convention, and it's also the default naming convention for code behind files that are created using Visual Studio.Net. [End Note]

Before showing you a code behind example, let's go over the theory behind it. As you should know by now, when an ASP.NET page is processed by the server, the page automatically inherits from the "Page" base class (for user controls, the page inherits from the "UserControl" base class), which contains all the functionality for rendering HTML code and server controls, as well as many other ASP.NET page processes.

For code behind pages, however, because the page cannot have a .aspx file extension, it doesn't automatically inherit from the "Page" base class (or any base class for that matter). This isn't a big problem; it just means that we have to derive a class from the "Page" base class manually, which I think is a bonus, and not a burden.

[Note] Code behind pages don't have to inherit directly from the "Page" base class. You can create your own base class that inherits from the "Page" base class and use that class as the base class for your code behind page. Doing it this ways allows you to centralize your initialisation code and create a more application-specific base class. [End Note]

Let's look at a code behind example now. Open up notepad and enter the following code. Save the file as sample_codebehind.aspx:

<%@ Page Language="c#" src = "sample_codebehind.aspx.cs" inherits="devArticles.Cdefault" %>

<html>
<head>
<title>Code Behind Example</title>
</head>
<body>
<asp:Label runat= "server" id = "Label1"/>
</body>
</html>

Open up another notepad window and enter the following code. Save the file as sample_codebehind.aspx.cs:

using System;
using System.Web.UI;
using System.Web.UI.WebControls;
using System.Web.UI.HtmlControls;

namespace devArticles
{
public class Cdefault : Page
{
public Label Label1;
public void Page_Load()
{
Label1.Text = "Hello World... Text from Code Behind";
}
}
}

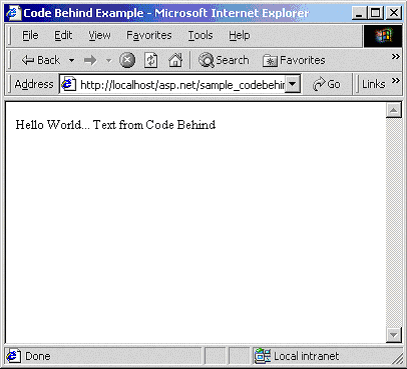
Run sample_codebehind.aspx in your browser. It should look like this:
aspcn_4.gif

Let's take a look at the code in our sample_codebehing.aspx file:

<%@ Page Language="c#" src = "sample_codehehind.aspx.cs" inherits="devArticles.Cdefault" %>

The code above links our ASP.NET page to the C# code behind page that we have created and tells the server which class to inherit from that code behind page. In our case, all of the code contained within the Cdefault class under the devArticles namespace, will be inherited.

We also have a label server control. We modify the value of this labels text property from the code behind file, sample_codebehind.aspx.cs. Let's look at our code behind file now:

using System;
using System.Web.UI;
using System.Web.UI.WebControls;
using System.Web.UI.HtmlControls;

The using statements shown above all us to work with server side controls (such as the <asp:label> tag) and manipulate them, amongst other things.

namespace devArticles
{
public class Cdefault : Page
{

Here we define the class and namespace that we have specified as the "inherits" attribute in the first tag of our .aspx page. Notice that we have to manually inherit from the "Page" base class, and if we don't, then our code wouldn't work as we intend it to.

public Label Label1;

This is a crucial part of our code behind page. We declare any controls that we want to use in our main .aspx file here. In our example we have declared a new Label control. For most of the server controls, its class name is the value of what you'd normally write after the first colon in its tag:

<asp:Label>

As you can see, we have created a new label server control. To instantiate a new Label class in our code behind file, we refer to the Label class, which is case sensitive.

private void Page_Load()
{
Label1.Text = "Hello World... Text from Code Behind";
}

The Page_Load() functions is the entry point for our ASP.NET page, and within it we simply set the text property of our label.

Conclusion

In this article we have taken a look at user controls, HTML controls, server controls and the code behind method. Join me tomorrow for part two of this article in which I will discuss custom controls and components.

In the meantime however, take a look at some of the links or books shown below for more information on ASP.NET controls and the .NET framework in general.

Support Material

This article contains a support file. To download the attached support file, please click here.

Related Links

http://www.4guysfromrolla.com/webtech/100500-1.shtml
http://www.asp101.com/articles/carvin/transtodotnet/default.asp
http://msdn.microsoft.com/library/en-us/cpguidnf/html/cpcondevelopingwebformscontrols.asp?frame=true

This article was contributed by James Yang at http://www.devarticles.com.devArticles provides ASP, PHP and .NET articles, tutorials, reviews, interviews and FREE eBooks. If you're after some serious programming tutorials then...

Visit http://www.devarticles.com now...OR, for free eBooks
visit http://www.devarticles.com/ebooks.php


Product Spotlight
Product Spotlight 

©Copyright 1998-2024 ASPAlliance.com  |  Page Processed at 2024-04-25 4:43:03 AM  AspAlliance Recent Articles RSS Feed
About ASPAlliance | Newsgroups | Advertise | Authors | Email Lists | Feedback | Link To Us | Privacy | Search