Before starting this step, you'll need to know the name of your MS Access database file, and the folder
you saved it too. The name of my Access database is email.mdb, and I saved it in my c:\temp folder.
I'll be creating a "System DSN" that points to it. Your Access database is probably in a different
location.
In order for
BoogiePOP Enterprise to connect and log to your database, you must first create
a "System" Data Source Name (DSN), on the computer running
BoogiePOP Enterprise, that points to your
database. To create a new "System" DSN, click the Database TreeView item within the BoogiePOP TreeView Window (see image below) for the BoogiePOP POP account you created in the previous step. Next,
click the "..." button next to the DSN selection box. This will launch the ODBC Data Source
Administrator Applet.
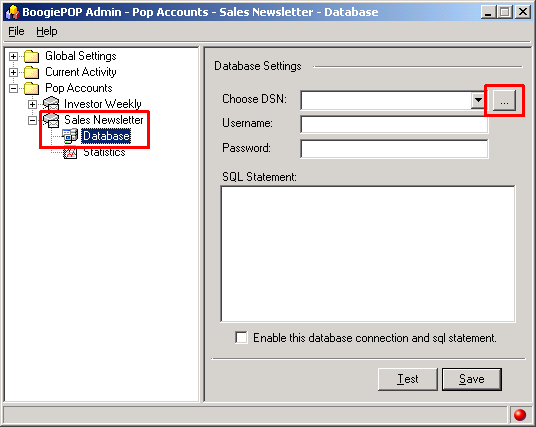
Sample BoogiePOP Database Connection Window
Click on the "System DSN" tab, and then click the "ADD" button to
launch the "Create New Datasource" dialog.

ODBC Data Source Administrator Applet
Select the "Microsoft Access Driver (*.mdb)" driver and click "FINISH" to
display the ODBC Microsoft Access Setup dialog.
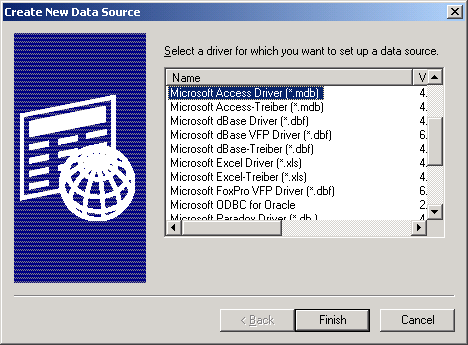
Create New Data Source Dialog
Enter a data source name and description for your database. For this article,
my data source name (DSN) will be "Email Bounce Log Database" and the description will be "BoogiePOP
Enterprise Bounce Logging". You can name your DSN whatever you like. Next, click on the SELECT
button to launch the "Select Database" dialog.
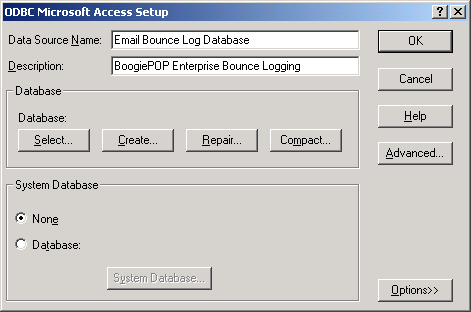
ODBC Microsoft Access Setup Dialog
Browse to your Access Database (Our example database name is called "email.mdb". Your database will
probably be named something different), highlight it, and click OK. At this point, you'll be taken back
to the "ODBC Data Source Administrator Applet".
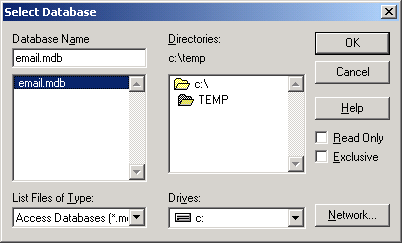
Select Database Dialog
You will see a newly created System DSN called "Email Bounce Log Database". Click OK to return
to BoogiePOP Admin.
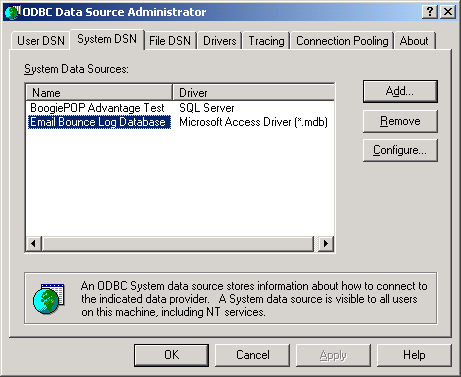
ODBC Data Source Administrator Applet
Select the "Choose DSN" dropdown box to select your newly created DSN. If your database
has a password protection system then type in your login and password for the database.
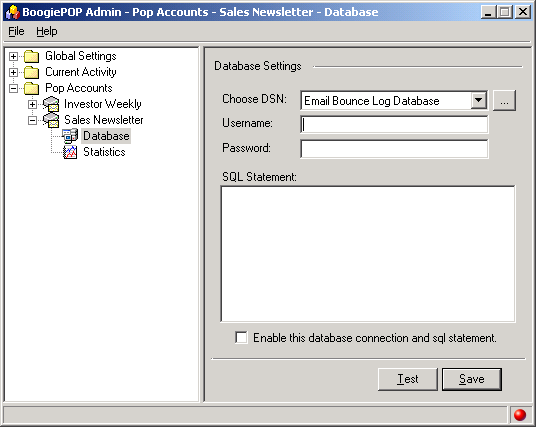
Database Screen after selecting our newly created DSN.
Entering your SQL Statement
Now that you have configured the DSN, it's time to enter the SQL statement. In order
for BoogiePOP Enterprise to log bounce data to your database, you must enter the SQL statement
that BoogiePOP Enterprise will execute each time it retrieves a bounced message from your
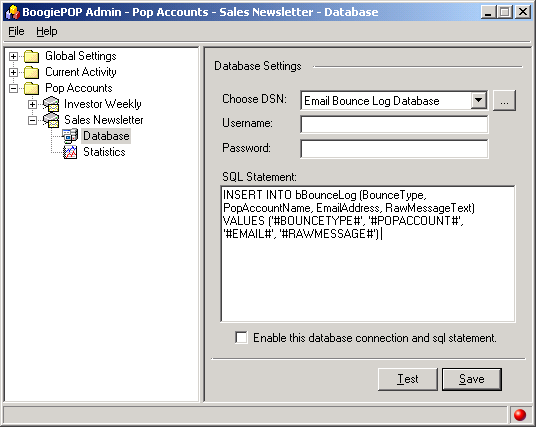
POP account. To acheive this goal, we'll be using a simple SQL INSERT statement (see below). You can
copy/paste the following SQL into the "SQL Statement" text box in BoogiePOP Admin.
|
|
INSERT INTO bBounceLog (BounceType, PopAccountName, EmailAddress, RawMessageText)
VALUES ('#BOUNCETYPE#', '#POPACCOUNT#', '#EMAIL#', '#RAWMESSAGE#')
|
Once you've entered the above SQL statement, your database settings window will look like the following for your BoogiePOP POP account:
Using BoogiePOP Variables
One important concept to remember when creating your SQL statement is the idea of BoogiePOP
variables. A BoogiePOP variable is a data value that can be used anywhere in your SQL statement. They are most commonly
used in the VALUES clause of an INSERT statement, the SET clause of an UPDATE statement, or as parameter values for a
SQL stored procedure.
You can use a variable by typing it into the SQL Statement text area using surrounding pound symbols "
##".
For example, to refer to the variable "
EMAIL", you would type "
#EMAIL#".
Variables are case-sensitive.
The table below lists the standard BoogiePOP variables that BoogiePOP can use within your SQL statements.
|
|
BOUNCETYPE | The bounce 'type' of the bounced message. (ie. SB, HB, GB, MB, MBKS, etc.) |
|
EMAIL | The recipient email address of the bounced message. |
|
POPACCOUNT | The POP account that BoogiePOP retrieved the bounced message from. |
|
RAWMESSAGE | The raw text of the email message BoogiePOP retrieved. |
NOTE: There are several more BoogiePOP variables that you can use, but they are not covered in this article.
Testing Your Database Connection & SQL Statement
You'll need to test your BoogiePOP POP account database settings after you have selected your
DSN and entered your SQL statement. To do this, click the "Test" button at the bottom
of the POP account database settings window. If everything works correctly, you'll see a message
like the one in the following image.
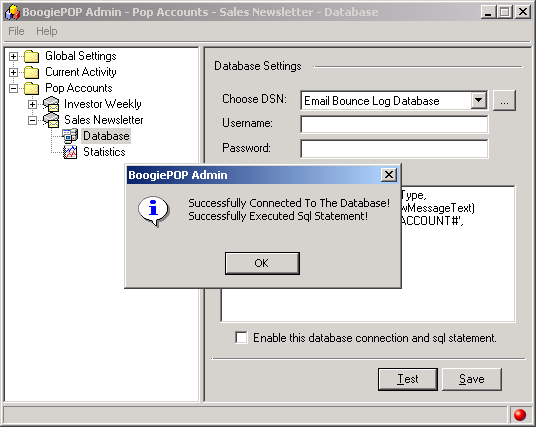
BoogiePOP Successful Test Dialog
To confirm that the "Test" button worked properly, you can also open your Access database and check
to see if the "test" record was inserted into the bBounceLog table. Each time you click the "Test" button
at the bottom of the POP account database setttings window, a record will be created in your bBounceLog
table. If everything worked correctly, you'll see a test record in the bBounceLog table. See image below.
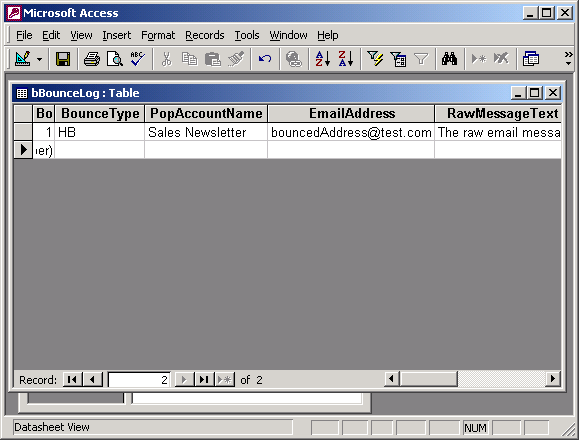
Successfully inserted test record
Enable This Database Connection and Sql Statement
Once you're done testing your BoogiePOP POP account database settings, you'll want to enable it. You
do this by making sure the "Enable This Database Connection and Sql Statement" checkbox has a check mark
in it. Selecting this checkbox will tell the BoogiePOP service to connect to the DSN, and execute
the SQL statement for every email bounce message it retrieves. If, at anytime, you'd like to stop logging to
your database then un-check this same checkbox.
Save Your Settings
In order for your new database settings to take affect, you must click the "Save" button
at the bottom of the POP account database settings window.