Note: I have assumed in this article that you have IIS running on your PC and have installed Visual Studio .NET.
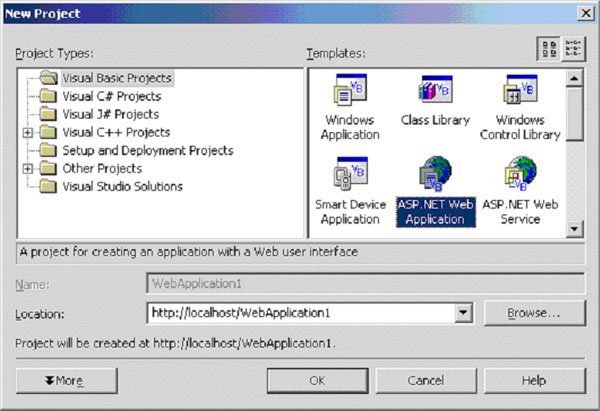
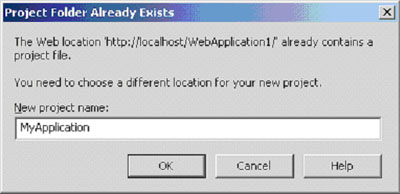
Start Visual Basic .NET and create a new Visual Basic project, selecting "ASP.NET Web Application" from templates and name it "MyApplication" as shown below.
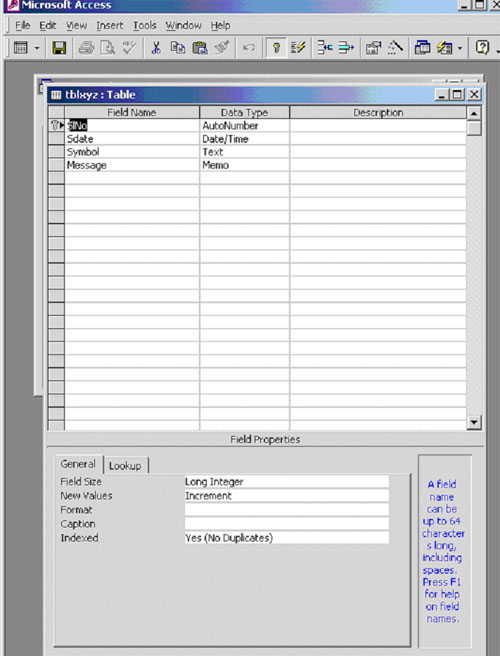
Now, create a new MS Access database, name it XYZ.mdb in C:\Inetpub\wwwroot\MyApplication directory. Create a table in the database, adding these fields: SlNo as AutoNumber, Sdate as Date/Time, Symbol as Text, and Message as Memo. Save the table as tblxyz and keep SlNo as primary key.
Now, go back to the Visual Studio project and refresh the Solution Explorer; you should be able to see XYZ.mdb in there, once you choose to Show All Files from the Project menu.
Add a new web form to the project by clicking on Project menu and then Add New WebForm. This WebForm will be called WebForm1.aspx; you can always rename it to make more sense out of name.
Ensure you're in Design view. Open the Toolbox and drag and drop an OleDBConnection and an OleDBCommand from the Data tab and one DataGrid from the Web Forms tab onto the form design surface.
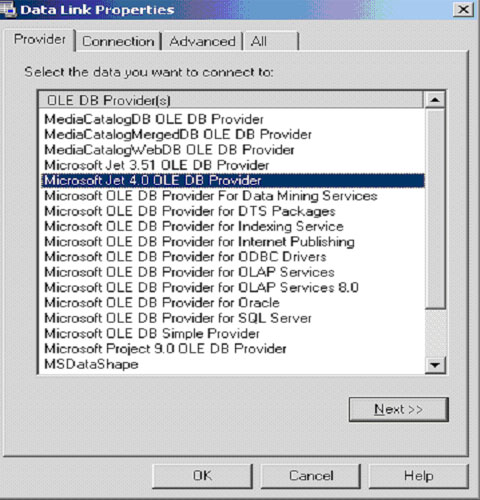
OleDBConnection and OleDBCommand will be named as oleDBConnection1 and oleDBCommand1, which can be renamed. To do this, single-click on oleDBConnection1 and go to Properties (or press F4). While there, set up the connection. Look under Data for ConnectionString and select Create New Connection: You will see a window pop up for Data link properties. Select Microsoft Jet 4.0 OLE DB Provider as below:
Click Next; you will then be on the Connection tab. Use the "..." browse button to find and select XYZ.mdb from C:\Inetpub\wwwroot\MyApplication\XYZ.mdb and then click on Test Connection.
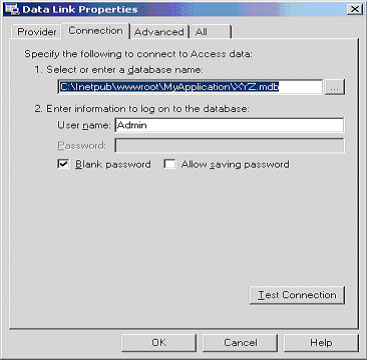
You will see a confirmation box saying the test succeeded. You are now set with your connection, so say OK to Data link properties, and you will be given a choice to include the password in the connection string. Choose not to include the password (for learning purposes).
Now single-click on oleDBCommand1. In the Properties window, under Behavior, choose existing connection and select oleDBConnection1. Under Data, type in the command text as Select * from tblxyz;" and under Command Type, keep it as Text.
Note: You can write the same query in the MS Access database, name it as (MyQuery or whatever), use the name MyQuery in CommandText property and for the Command Type property, select Stored Procedure--it will work the same way as with above option.
Finally, go to the Webform1.aspx.vb page, which is called the code-behind page, and type in the following code in the Private Sub Page_Load method:
Private Sub Page_Load(ByVal sender As System.Object, ByVal e As System.EventArgs) Handles MyBase.Load
'Put user code to initialize the page here
If Not Page.IsPostBack Then
DataBind1()
End If
End Sub
And create another sub like this:
Sub DataBind1()
Dim adp As New OleDb.OleDbDataAdapter(OleDbCommand1)
Dim ds As New DataSet
adp.Fill(ds)
DataGrid1.DataSource = ds
DataGrid1.DataBind()
End Sub
(Also, don’t forget to enter some data into your database.)
Hit F5 on your keyboard. This action will save your whole project and run the project's start page in the web browser. You may need to set the project's start page by right-clicking on the WebForm1.aspx file and choosing Set as Start Page. Using F5 attaches the debugger, so if you just want to run wihout debugging, you can use CTRL-F5.
Once the project runs, will see your DataGrid filled with database items on the web browser. This is how simple it is to display your Access data on the Web. You can customize your DataGrid by right-clicking on it and going to Property Builder. Also, you can automatically format the DataGrid by right-clicking and selecting Auto Format.
In other articles, we will discuss how to customize what you want to show in the DataGrid and in what format. Also, we will see, how to make data entry through the Web and edit that data online.