ASP.NET 2.0 ships with many new controls to reduce development time. In this article, you will learn how to build a site map for your web site. First, you will require a file with the contents required to create a site map. This file is in XML format. We will employ Visual Studio 2005 in order to create this file.
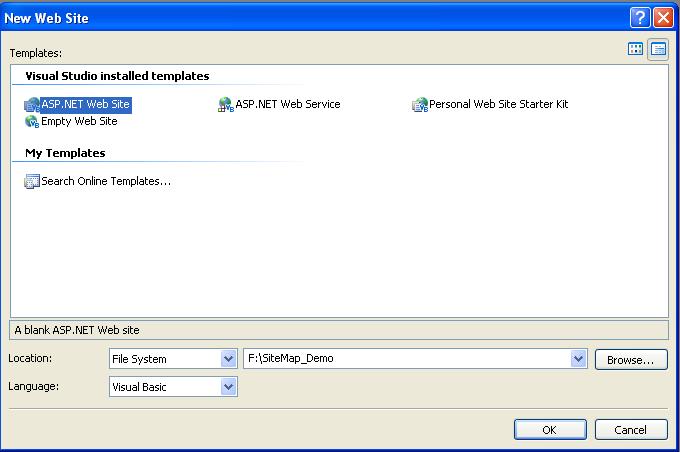
Before creating a Site Map file, you should create a new web project. Within Visual Studio 2005, click on the File menu and select New Web Site. Select the ASP.NET Web Site template and provide a meaningful name for the project, as shown in figure 1.
Figure 1
When you click the OK button in the New Web Site dialog, Visual Studio 2005 creates the files required for successfully running the project. Let us now create a Site Map file. Click the Website menu and select the Add New Item menu option. Select the Site Map entry from the Visual Studio installed templates section, and leave the Name field as it is, as shown in figure 2. We will use the default file name for this article.
Figure 2

Visual Studio automatically creates the required initial code as shown in listing 1. Copy the code given in listing 2, paste this code into the Site Map file you created, and save the file.
Listing 1
<?xml version="1.0" encoding="utf-8" ?>
<siteMap xmlns="http://schemas.microsoft.com/AspNet/SiteMap-File-1.0" >
    <siteMapNode url="" title=""  description="">
        <siteMapNode url="" title=""  description="" />
        <siteMapNode url="" title=""  description="" />
    </siteMapNode>
</siteMap>
Listing 2
<?xml version="1.0" encoding="utf-8" ?>
<siteMap xmlns="http://schemas.microsoft.com/AspNet/SiteMap-File-1.0" >
    <siteMapNode title="Welcome to Page 1"  description="Page 1">
        <siteMapNode url=<a href="http://www.microsoft.com">http://www.microsoft.com</a
               title="Welcome to Microsoft" description="MICROSOFT" />
        <siteMapNode url=<a href="http://www.sun.com">http://www.sun.com</a
               title="Welcome to Sun" description="SUN" />
        <siteMapNode url=<a href="http://www.oracle.com">http://www.oracle.com</a
               title="Welcome to Oracle" description="SUN" />
        <siteMapNode title="Welcome to Page 2"  description="Page 2">
            <siteMapNode url=<a href="http://msdn.microsoft.com">http://msdn.microsoft.com</a
                   title="Welcome to MSDN" description="MSDN" />
            <siteMapNode url=<a href="http://www.asp.net">http://www.asp.net</a
                   title="Welcome to ASP.NET" description="ASP.NET" />
            <siteMapNode url=<a href="http://www.aspalliance.com">http://www.aspalliance.com</a
                   title="Welcome to ASP Alliance" description="ASP.NET" />
        </siteMapNode>
    </siteMapNode>
</siteMap>
Open the Default.aspx file and select its Design view. From the Data section of the Toolbox, add a SiteMapDataSource control to the form. From the Navigation section of the Toolbox, add a TreeView control to the form. For each control, and leave the ID property as it is, as we will use the default values in this article.
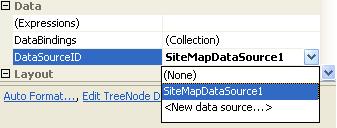
Select the TreeView control and use the Properties window to set its DataSourceID property to the SiteMapDataSource control, as shown in figure 3.
Figure 3
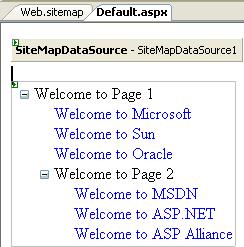
Once you select the SiteMapDataSource as the DataSource for the TreeView control, you will be able to view immediately the Site Map's contents inside the TreeView control, as shown in figure 4. Save and run the application.
Figure 4
The code for the Default.aspx file will look similar to the code shown in listing 3.
Listing 3
<form id="form1" runat="server">
        <asp:SiteMapDataSource ID="SiteMapDataSource1" runat="server" />
        <br />
        <asp:TreeView ID="TreeView1" runat="server" DataSourceID="SiteMapDataSource1" Height="200px">
        </asp:TreeView>
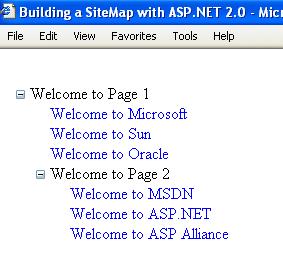
The final output will look similar to the page shown in figure 5.
Figure 5
That’s it. You have successfully created a sitemap for your website using a TreeView control.
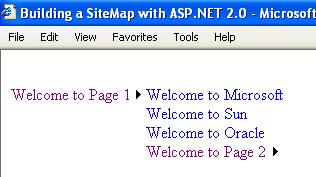
You can also bind the above Site Map file to a Menu control (which ships with ASP.NET 2.0) in one easy step. From the Navigation section of the Toolbox, drag and drop a Menu control on to the form and set its DataSourceID property to the SiteMapDataSource control. Run the application and you will be able to view the newly created menu as shown in figures 6 and 7. You can play with various properties of the Menu control, such as its appearance and behavior, using the Properties window in Visual Studio 2005.
Figure 6: Menu control in its inactive state
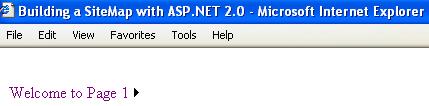
Figure 7: Menu control while hovering over the first menu item
In this article, you have learned how to build a simple site map for your website with two powerful controls that ship with the .NET Framework 2.0. You should now understand how easy it is to develop web applications using ASP.NET 2.0.
Happy Coding…