[Download Code]
A common task in web applications is obtaining data from the user. Creating a single large form makes it easy for us to collect, validate and save this data. Yet that same large form may overwhelm the user.
How often have you found a site that perked your interest only to realize that you must complete a form that seems to scroll forever? I know that I have been in this position more times than I care to recall.
The ASP.NET Panel control allows us to construct a single page containing all the form elements required, while presenting the user with what appears to be separate smaller pages. This creates a much better user experience.
An additional benefit of this technique concerns validation. By using Panels to simulate multiple pages, we can keep validation summaries close to the source of any problems. This saves the user from otherwise having to scroll down a long form, looking for the reported error.
I assume in this article that you have basic knowledge of Microsoft Visual Studio .NET and the C# language. To begin, I will discuss the process of creating the web form.
Within your web project add a new web form. Once you have created a web form, drag and drop a Panel control onto the form from your toolbox. Now that you have your Panel ready, resize the Panel to your specifications, and then drag and drop any combination of form controls inside the Panel. In my case I added Label and Textbox controls to create the following:

You may wish to read the particulars of the Panel Class, Label Class, and TextBox Class.
Be sure to add a control that will allow for advancement to the second Panel. I have given my form a Continue button.
Repeat the process to add a second Panel and more form controls. The only difference is that the second Panel will not be visible when the page loads. Why? Simply setting the Panel’s Visible property to False will provide the illusion of multiple pages that I earlier spoke of.
In Visual Studio’s Design View you may set a Panel’s Visible property to False via the Properties Window. In the IDE’s HTML View you may do the same by adding Visible="False" to the Panel’s declarative syntax. By setting the second Panel's Visible property to False, only the first Panel will initially be visible to the user.
Now that you are familiar with the usage of Panels, we will look at displaying one Panel while hiding the other.
Back on Panel #1 we added a Continue button. Within your IDE, double-click this button and you will be taken to the code-behind for the web form. If you pay attention you will see that by double-clicking the button an empty method was created for you. Update the method with the following code:
private void Button1_Click(object sender, System.EventArgs e)
{
    // Add the following for Panel
    // visibility attributes


    //Hide Panel #1
    Panel1.Visible = false;


    // Show Panel #2
    Panel2.Visible = true;
}
The method name Button1_Click is derived from the ID of the button. If I had given the button an ID of btnContinue, the method name would have been btnContinue_Click.
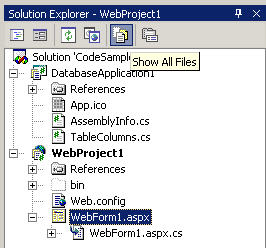
If you prefer to write out the method yourself rather than double-clicking the button, you can get to the code-behind by simply opening the .cs file in your IDE. If you do not see the .cs file then click the Solution Explorer’s Show All Files button.
I have discussed above how to provide the illusion of multiple pages by adding form elements to separate Panel controls, and controlling the visibility of the Panels. It is now time to discuss extended data collection.