Using the Admin Utility, you must create a new BoogiePOP POP Account that
BoogiePOP Enterprise will retrieve your bounced email messages from. The BoogiePOP POP Account that you create
should be configured to use the POP email box where all of your "bounced" email messages
are sent too. Typically, this is the same email account as the "FROM" email address of your outbound
email messages. To create a new BoogiePOP POP account, follow the instructions below.
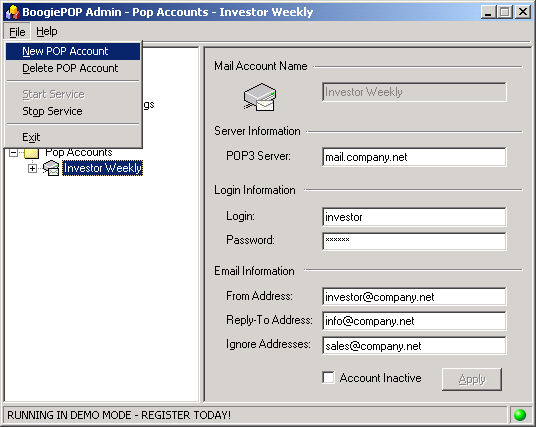
First, click the File menu and select "New POP Account" (see image below).
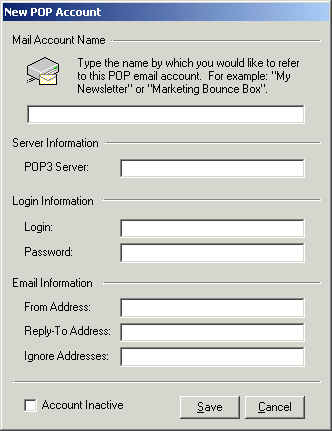
The following dialog will be displayed. Enter all of the required information as it
pertains to you. For an
explanation of each field, see the
bottom of this page.
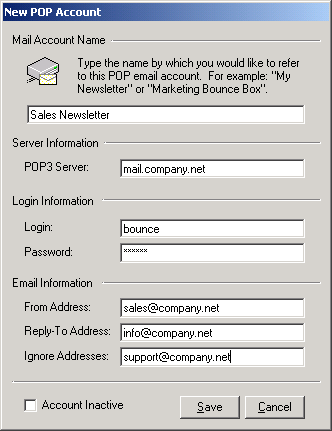
For this article, I'll create a BoogiePOP POP Account called "Sales Newsletter".
The following image shows the information I entered. The information you enter should
be different.
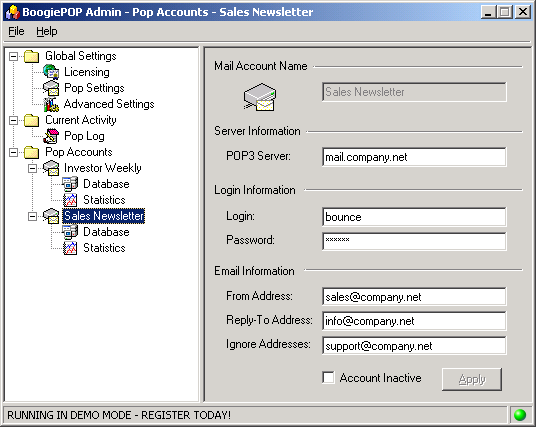
Click the "Save" button when you're done entering the required information. Your new
BoogiePOP POP account will be created. In the image below, notice that a new POP account called "Sales Newsletter"
is displayed in the BoogiePOP Admin TreeView Window.
 POP Account Field Descriptions
Mail Account Name:
POP Account Field Descriptions
Mail Account Name: This is the name that you'd like to refer to the new POP account as. The information
you enter in this field will be displayed in the BoogiePOP TreeView Window under
the "POP Accounts" folder. The "Mail Account Name" can be up to 20 characters in length.
POP3 Server: This is the name of the email server where your "bounce" email box resides.
It can be a domain name such as "mail.boogietools.com" or an IP address in string form such as "127.0.0.1".
Login: Enter the username for your "bounce" email box here.
Password: Enter the password for your "bounce" email box here.
From Address: This is the email address of the "bounce" email box. All of your email bounces are sent to this
email address.
Reply-To Address: The "Reply-To" email address is the email address that is used when your email recipients
hit "reply" to your messages. When they hit "reply", their email message is sent to the "Reply-To" email box. It's
highly recommended that you have two POP email boxes for all of your opt-in email communications. One
email box for all of your "bounces" to go too, and one email box for all of your "replies" to go too. Having 2 POP
email boxes for all of your opt-in email communications will allow all of the "email bounces" to end up in one email
box, and all of the "replies" to end up in a separate email box. Doing this will improve BoogiePOP performance
tremendously because BoogiePOP won't have to parse all of your "non-bounce" replies.
Ignore Addresses: The "Ignore Addresses" field isn't used by BoogiePOP in all
cases. Sometimes BoogiePOP knows that a message is a bounce, but for some reason the
email address of the recipient isn't in the position that BoogiePOP is expecting it to
be in. When this occurs, BoogiePOP does a deeper scan of the bounced message to find the proper
recipient email address. BoogiePOP doesn't want to pass back the From, Reply-To, or the
Ignore Addresses of the original sender by mistake, so it checks for these while calculating
who the original recipient was. You do not need to re-enter your "From" and "Reply-To" email addresses
here, but you may use this field for any other email addresses that may appear in your outbound
messages.
You can enter several email addresses in this field if you need too. Just make sure
you separate each email address with a PIPE character. For example:
support@acme.com|accounting@acme.com
The example above is made up of 2 email addresses. support@acme.com and accounting@acme.com.
Account Inactive: Check this box to prevent BoogiePOP from retrieving
messages from this POP account.