In this section, we will start by implementing a user profile that comprises a few simple properties. Listing 1 shows a web.config file with a sample profile configuration section. Note that only one profile configuration section can be defined in a web application. We cannot define another profile section in an application subfolder.
Listing 1: Simple Profile Property Configuration
<configuration>
    <system.web>
        <authentication mode="forms" />

        <anonymousIdentification enabled="true" />

        <profile enabled="true">
            <properties>
                <add name="FirstName" defaultValue="Bilal" type="string"
                     allowAnonymous="true" />
                <add name="LastName" defaultValue="Haidar" type="string"
                     allowAnonymous="true" />
            </properties>
        </profile>
    </system.web>
</configuration>
In this sample web.config file, Forms Authentication and Anonymous Identification are both enabled, thus allowing anonymous Profiles in the web application.
The profile configuration section is enabled and consists of the following custom properties:
-
FirstName: Representing the first name of the user visiting the web application. Its default value is set to Bilal and it is enabled for anonymous users.
-
LastName: Representing the last name of the user visiting the web application. Its default value is Haidar and it too is enabled for anonymous users.
Both profile properties have a data type of string. We could omit that parameter, since the default data type for any profile property is string.
The anonymousIdentification section, when enabled, generates a unique ID for each anonymous visitor. Enabling this feature makes the Profile object available for both anonymous and authenticated users.
When the Profile section is defined in the web.config file, a Profile class is dynamically generated when the web application starts. This class, which inherits from the ProfileBase class, has strongly typed accessors added for each property defined in the profile section of the configuration file. This class is stored in the Temporary ASP.NET Files directory, which is the same place where the class files are stored for dynamically generated ASP.NET pages. Once the Profile class is generated, an instance is added to the current HttpContext object and populated with either the default values (for a new user) or retrieved values (for a returning user).
Once the Profile configuration section is defined, we can start accessing the Profile object from the server-side code as shown in the code below:
Profile.FirstName = "Johny";
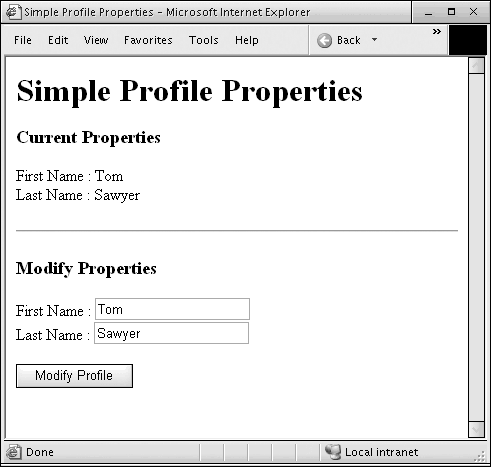
The page in Listing 2 shows how to use a Profile object to persist user-specific information. This page displays a form to modify the values of the user's profile properties, which are FirstName and LastName. Then, after modifying the properties, it will display them above the form (see Figure 1).
Figure 1. Simple Profile Properties
Listing 2. SimpleProperties.aspx
<%@ Page Language="C#" %>
<script runat="server">
    protected void Page_Load(object sender, EventArgs e)
    {
        if (!Page.IsPostBack)
        {
            FirstNameTextbox.Text = Profile.FirstName;
            LastNameTextbox.Text = Profile.LastName;
        }
    }
    protected void Modify_Click(object sender, EventArgs e)
    {
        if (!string.IsNullOrEmpty(FirstNameTextbox.Text))
            Profile.FirstName = FirstNameTextbox.Text;
        if (!string.IsNullOrEmpty(LastNameTextbox.Text))
            Profile.LastName = LastNameTextbox.Text;
    }
    protected void Page_PreRender(object sender, EventArgs e)
    {
        FirstNameLabel.Text = Profile.FirstName;
        LastNameLabel.Text = Profile.LastName;
    }
</script>

<html xmlns="http://www.w3.org/1999/xhtml">
<head id="Head1" runat="server">
    <title>Simple Profile Properties</title>
</head>
<body>
    <form id="form1" runat="server">
    <div>
        <h1>
            Simple Profile Properties</h1>
        <h3>
            Current Properties</h3>
        <p>
            First Name : <asp:Label ID="FirstNameLabel" runat="server" /><br />
            Last Name : <asp:Label ID="LastNameLabel" runat="server" /><br />
            </p>
        <hr />
        <h3>
            Modify Properties</h3>
        <p>
            First Name : <asp:TextBox ID="FirstNameTextbox" runat="server" /><br />
            Last Name : <asp:TextBox ID="LastNameTextbox" runat="server" /><br />
            </p>
        <p>
            <asp:Button ID="Modify" OnClick="Modify_Click" Text="Modify Profile"
                runat="server" />
            </p>
    </div>
    </form>
</body>
</html>
The SimpleProperties page in Listing 2 shows the Profile object in action. Notice that in Listing 1 we have enabled anonymousIdentification. We have also set allowAnonymous to true for both Profile properties. This allows us to access those properties even when the visitor to the web page is an anonymous user, which is the case when testing the page above.
Notice that if the browser is closed and then the same page opened again, the last modified values are displayed. This shows that the Profile properties were persisted, even for an anonymous user.
Finally, if we set allowAnonymous to false for each property, and try to set a profile property while the current visitor is an anonymous user, an exception would be thrown saying that one cannot access a Profile property that is not configured to be used by anonymous users.