·
Initially, you can start with predefined templates. I will start
with Team Site Template.
·
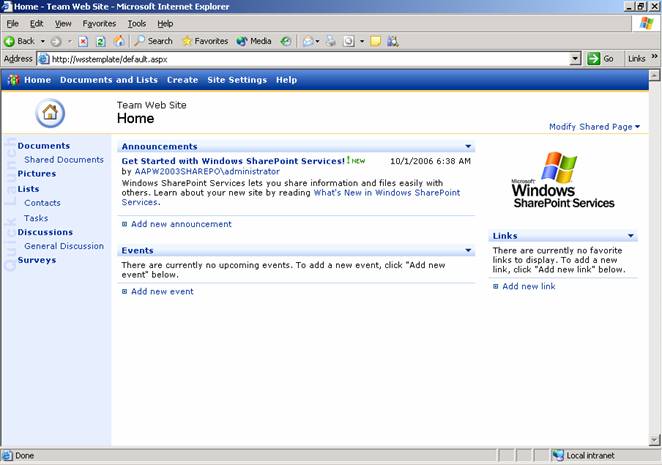
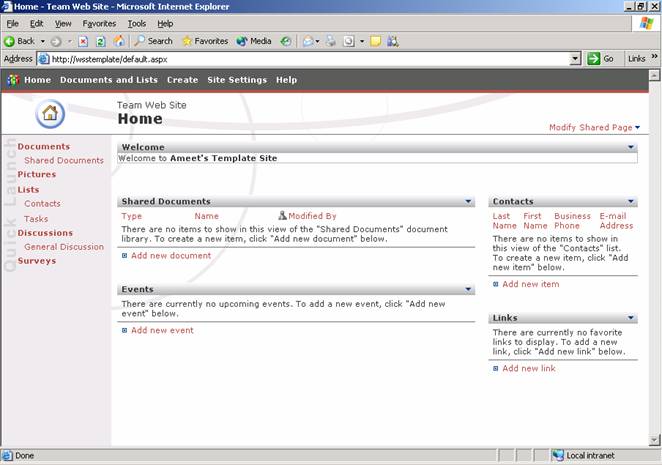
As soon as your site is created, it will display the web parts
and layout for that particular template. In my scenario, it will display as
Figure 5.
Figure 5
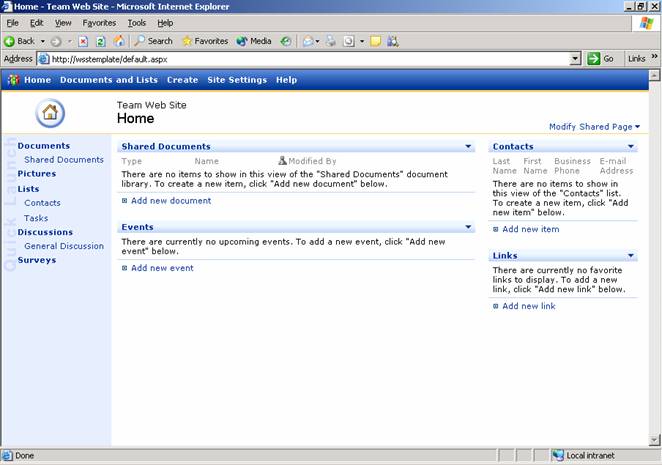
Make as many
changes as you want on this screen. I am going to do the following changes:
·
Remove the Windows Share Point Services Logo and Announcements.
·
Add the Document Library Web Part.
·
Add the Contact Web Part.
·
My Final WSS Site will look like the following.
Figure 6
·
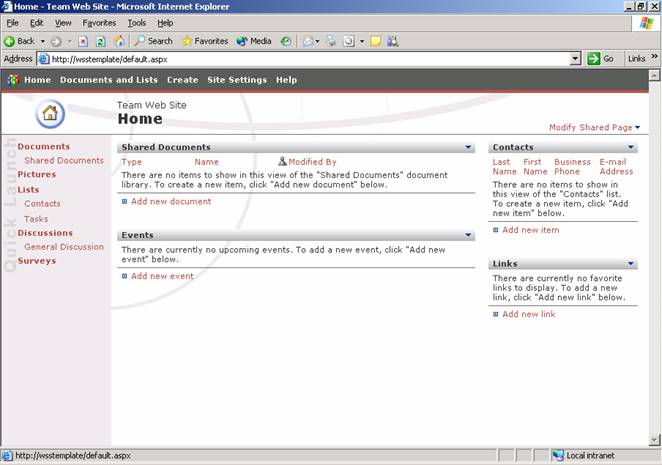
Now, I will also change the Theme for this site.
·
I am going to select the Compass Theme from the Apply Theme to
Web Site Page.
Figure 7
You can also
make more design changes by opening this page in Front Page 2003. As you might
have found out, Front Page 2003 is tightly integrated with SharePoint. In
order to edit with Front Page 2003, follow these steps.
·
Click on File.
·
Select Edit With Microsoft Office FrontPage.
·
FrontPage 2003 will open with your page and also with the
complete site navigation in it.
·
Make any necessary changes in FrontPage. The FrontPage features
with SharePoint are beyond the scope of this article.
·
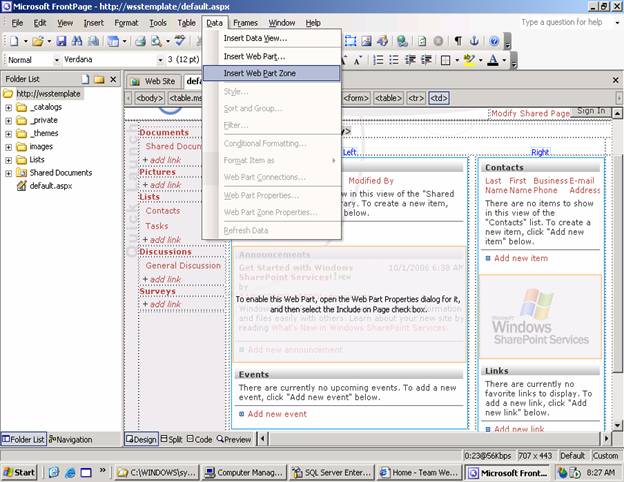
For this example I am going to add a new Zone at the top called Top
Zone. I will follow these steps to add the new zone to it.
·
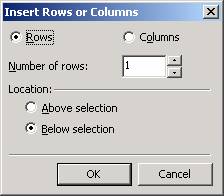
Select the row with Left and Right zones.
·
Select Table and Select Insert -> Rows or Columns.
·
The following dialog box displays.
Figure 8
·
In this window make sure the Rows radio button is selected.
·
In Location select the Above Selection option.
·
Keep the Number of Rows to 1.
·
Click OK.
·
The row is then inserted.
·
Now highlight the complete row and select Table -> Merge Cells.
·
The columns will merge.
·
Now make sure that your cursor is in the newly added row.
·
Select Data Menu.
·
Under Data Menu select Insert Web Part Zone.
Figure 9
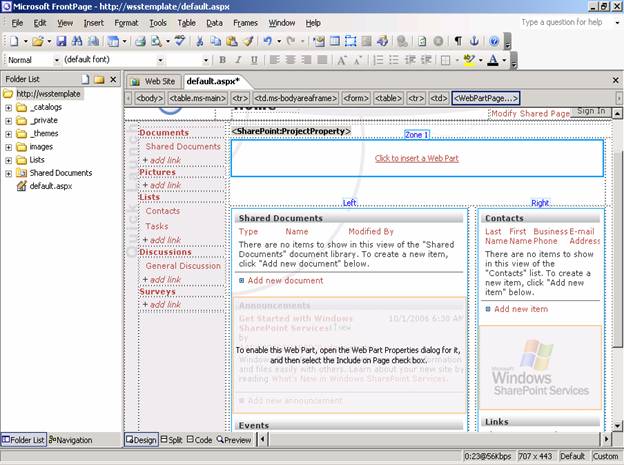
·
The Web Part Zone is added to the newly created Row. Your screen
should look like the one below.
Figure 10
·
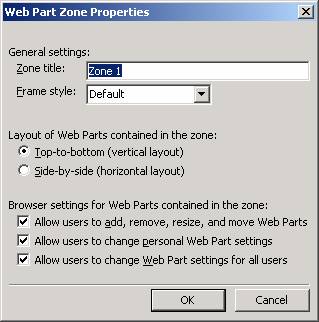
Now we need to set the property for the Web Part Zone.
·
Select the Web Part Zone, right click on it and select Web Part
Zone Properties.
Figure 11
·
Give a suitable Title to Zone Title Property; keep the remaining
properties the same. I am going to name it Top Zone.
·
Click OK.
·
Now your Top Web Part Zone is ready to be used.
·
Save the Page.
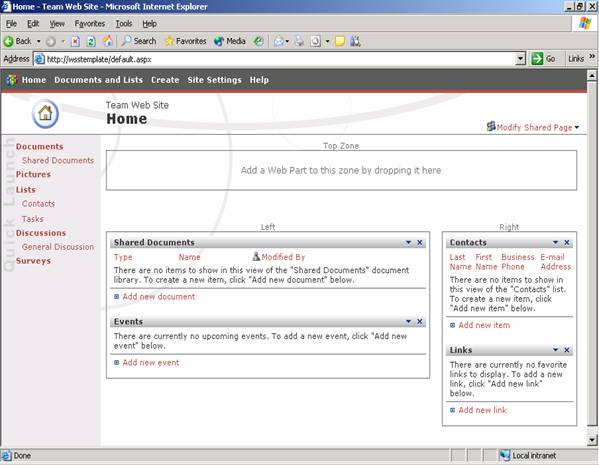
·
Refresh your web page in IE. Your page should look like
following in design mode.
Figure 12
·
Now let us add the Content Editor Web Part to the Top Zone.
Figure 13
·
Now I am done with my changes. I need to export this site as a template
to be used next time when creating similar sites.
·
To save this site as a template follow these steps.
·
Click on Site Settings.
·
Under Administration, click Go to Site Administration.
·
Under Management and Statistics, click Save Site as Template.
·
The Save Site as Template screen is displayed.
Figure 14
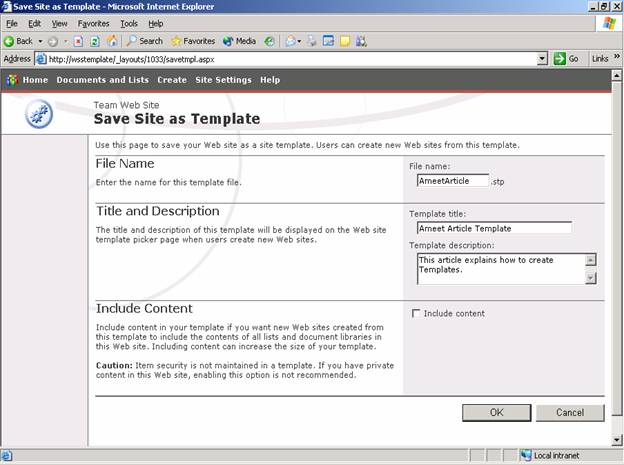
·
Enter a Suitable name to the file name, template title and
description; if you wish, you can also include the content created on this
site.
·
Click OK.
·
Upon successful completion you should get an Operation Completed
Successfully page.
Figure 15
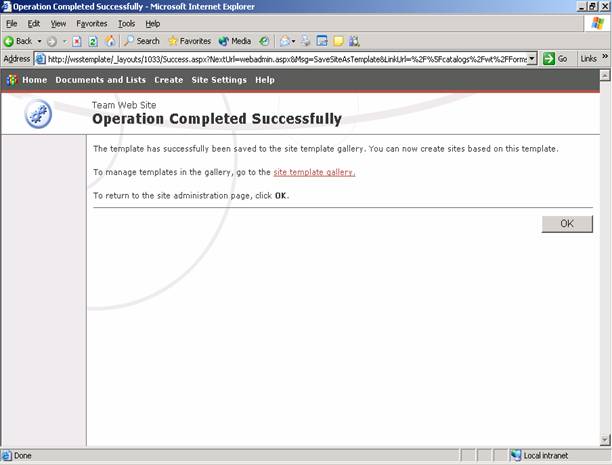
·
Now we need to save this file to our local machine. Follow these
steps to save the stp file.
·
Click on the Site Template Gallery link in the above image.
·
The site template gallery screen displays as follows.
Figure 16
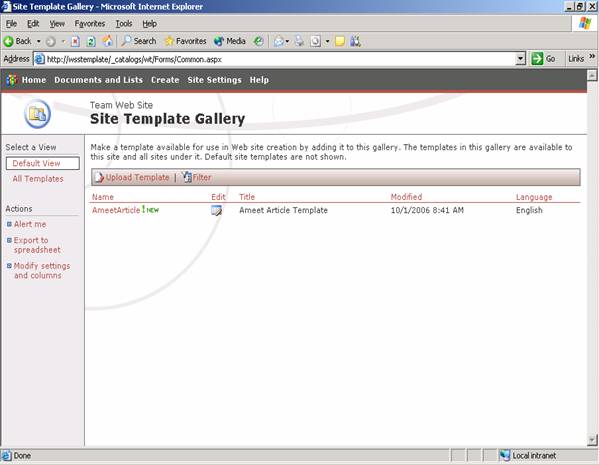
·
Right Click on the template and select Save Target As.
·
In the Save As box, select the folder where you would like to
save the template.
·
The template has been saved to your local drive.
In this section we saw how we can create a WSS Template.