So you have a report developed in Crystal Reports that needs
to be distributed to 10 associates in your company weekly. This part of the
Enterprise Server is for you. There are a few ways that this can be done.
Using InfoView, the associates could view the reports themselves using that web
site. This is a pull method and usually it is easier to push the report to
these folks. So let us send an email every week to our end users.
First, we need to get your report into Enterprise server.
To do this in a drag and drop manner, you will simply log onto your server. This
assumes that you have already installed Business Objects Enterprise Server. We
will upload a document using the administrative tools. As an administrator you
can set it up so other users can upload reports and other documents to the Enterprise
Server as well.
To upload, you need to have access to the Central Management
Console. See figure 1 to see what this looks like.
Figure 1
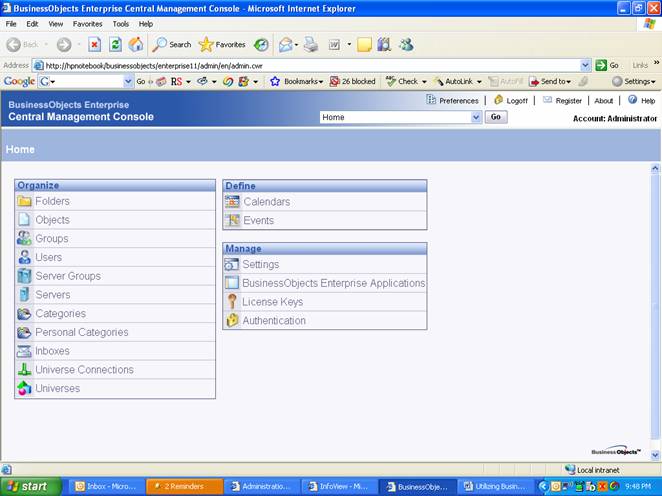
In the CMC make sure to create a folder where you want to
view your reports. Using the Folders you can organize where your content is to
reside. For instance, if you organize through departments, you might make your
folders hierarchical by department. Take care in deciding on this setting.
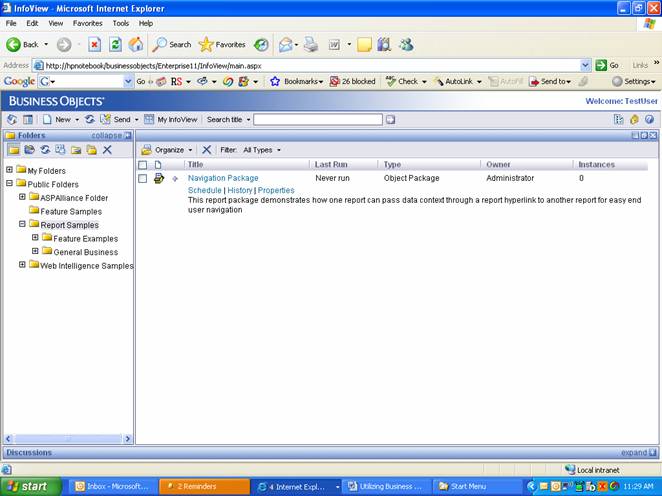
Figure 2 shows an example of how the folders will appear to an end user
utilizing InfoView.
Figure 2
When creating your folders, you can assign rights, create
keywords for searching, create subfolders within the folder, and add objects to
the folder. When editing folder properties, the administrator can also limit
how many instances of an object are allowed on the server. This can help administrators
in keeping the size of your instance of Business Objects under control.
To add a report to your folder, just use the New Object
button to upload the report to the server. Besides reports you can upload
object packages, Microsoft Excel, Word and PowerPoint, Rich Text files, Text
files, programs or hyperlinks. There is also a place to change the folder name
and you can opt to place this in the object repository.
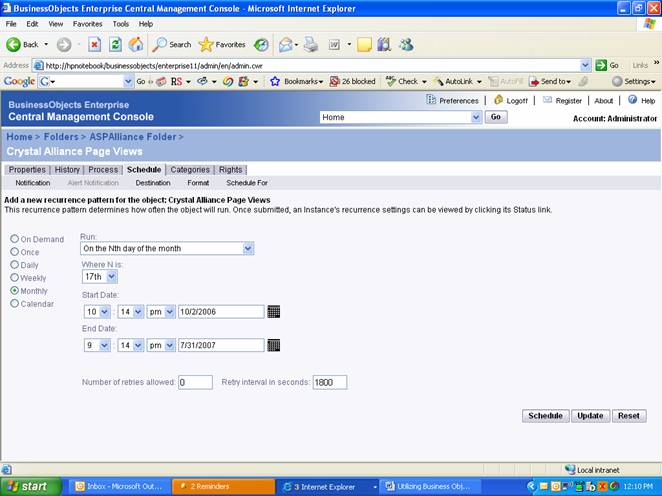
Once you upload that object, you can add some more
functionality to the report using the administration module. For instance, you
can schedule the report to run. As you can see with Figure 3, the scheduling
module allows you to specify a destination (email, file, or inbox). You can
also use the notification option to put in place audit trails for these
scheduled jobs. There is also a place to specify the format of the report when
it is sent. Most formats your expect from Crystal are available here. Using the
Schedule for option, you can specify users available in Enterprise Server for
this report.
Figure 3
 In this module you can also set
different rights for this report. You can also see a history of the scheduled
objects here. The history tab shows all instances of the report and whether
server successfully sent them. By clicking on a successful send, you can view
that instance of the report (good for snapshots). You an also resend that
instance of the report if needed from this screen.
In this module you can also set
different rights for this report. You can also see a history of the scheduled
objects here. The history tab shows all instances of the report and whether
server successfully sent them. By clicking on a successful send, you can view
that instance of the report (good for snapshots). You an also resend that
instance of the report if needed from this screen.
As you can see this part of the administration of Business
Objects is robust with much you can do with it. We will now explore the
Interface to the end user using InfoView